Water pooling in your Portsmouth garden after heavy rain or gurgling sounds from sinks are warning signs that your drains may be struggling. Ignoring these issues can lead to unpleasant surprises and emergency repairs when you least expect them. By focusing on drainage assessment and modern jetting methods, you protect your property, avoid escalating costs, and gain confidence that your pipes are working at their best.
Table of Contents
- Step 1: Assess Drainage Issues And Locate Blockages
- Step 2: Prepare Jetting Equipment And Safety Gear
- Step 3: Perform Jetting To Clear Blockages
- Step 4: Inspect Drains For Debris And Flow
- Step 5: Verify Effectiveness And Prevent Future Problems
Quick Summary
| Key Point | Explanation |
|---|---|
| 1. Assess drainage issues first | Evaluate water behaviour after rainfall to locate potential blockages before calling professionals. |
| 2. Use proper jetting preparation | Inspect equipment and safety gear thoroughly to avoid hazards during the jetting process. |
| 3. Perform effective jetting techniques | Start with low pressure, gradually increase, and use reverse spray for efficient blockage clearing. |
| 4. Inspect and verify drain function | Test water flow post-jetting to ensure blockages are fully cleared and drainage systems are working. |
| 5. Implement preventive maintenance | Schedule regular inspections and preventive actions to avert future drainage problems. |
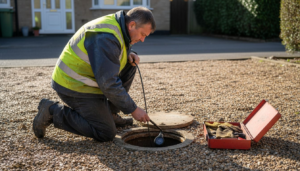
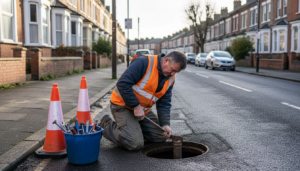
Step 1: Assess drainage issues and locate blockages
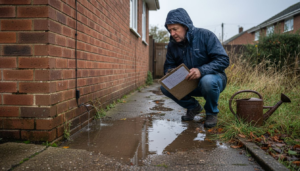
Before you call in professionals, understanding what’s happening beneath your drains saves time and money. Assessing drainage issues involves identifying where water pools, how quickly it drains, and whether you’re dealing with a minor blockage or something more serious.
Start by observing your property’s water behaviour during and after rainfall. Walk around your garden and note areas where water sits or flows slowly. Poor grading, soil saturation, and runoff patterns often reveal blockage locations before symptoms worsen inside your home.
Look for these telltale signs:
- Water backing up in sinks, showers, or toilets
- Slow draining across multiple fixtures
- Pooling water in your garden or driveway
- Unusual gurgling sounds from pipes
- Foul odours near drains or inspection covers
Inspect your inspection chamber covers (those plastic or metal lids scattered around your property). Carefully remove one and look inside. Does water level seem unusually high? Is there visible debris or tree roots? This tells you whether the blockage sits between your home and the main sewer.
Understanding topography, soil permeability, and hydrological patterns helps you predict where blockages form. Low spots in your garden attract water; tree roots follow moisture through clay soils; grease solidifies in cooler sections of pipes.
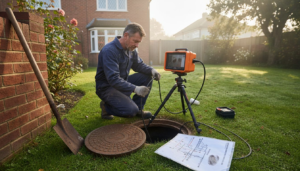
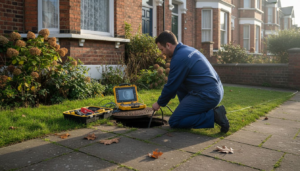
Professional CCTV drain surveys pinpoint exact blockage locations and save you guesswork, though visual inspection gives you a solid starting point.
Trace your drainage route mentally. Most Portsmouth homes have drains running from kitchens and bathrooms toward the road or septic systems. Blockages typically occur at bends, junctions, or tree root zones.
Pro tip: Create a simple sketch of your drainage layout showing inspection covers, gullies, and low spots. When professionals arrive, you’ll describe issues accurately and they’ll access the right areas immediately, reducing call-out time.
Here’s a quick comparison between amateur and professional drain assessment methods:
| Assessment Method | Tools Required | Accuracy Level | Typical Cost Impact |
|---|---|---|---|
| Visual garden inspection | None (except keen eye) | Moderate, location guesses | Saves initial call-out fee |
| Inspection chamber check | Screwdriver, torch | High for local issues | Reduces repeat visits |
| CCTV drain survey | Specialised camera | Very precise | Higher upfront, avoids unnecessary work |
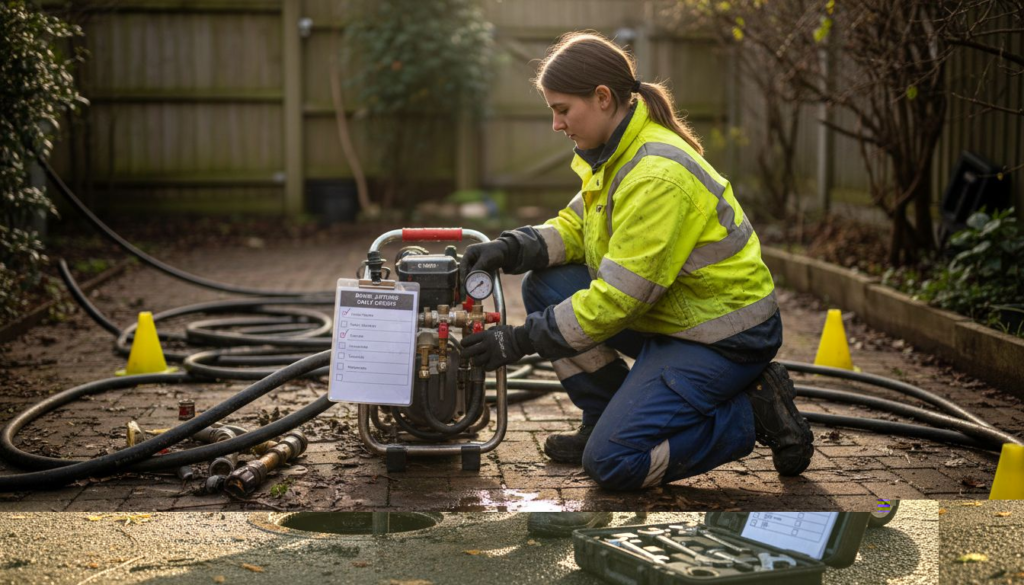
Step 2: Prepare jetting equipment and safety gear
Proper preparation is what separates a successful jetting operation from a dangerous one. Before any water hits your drains, you’ll need to inspect your equipment, gather the right protective gear, and ensure everything functions safely.
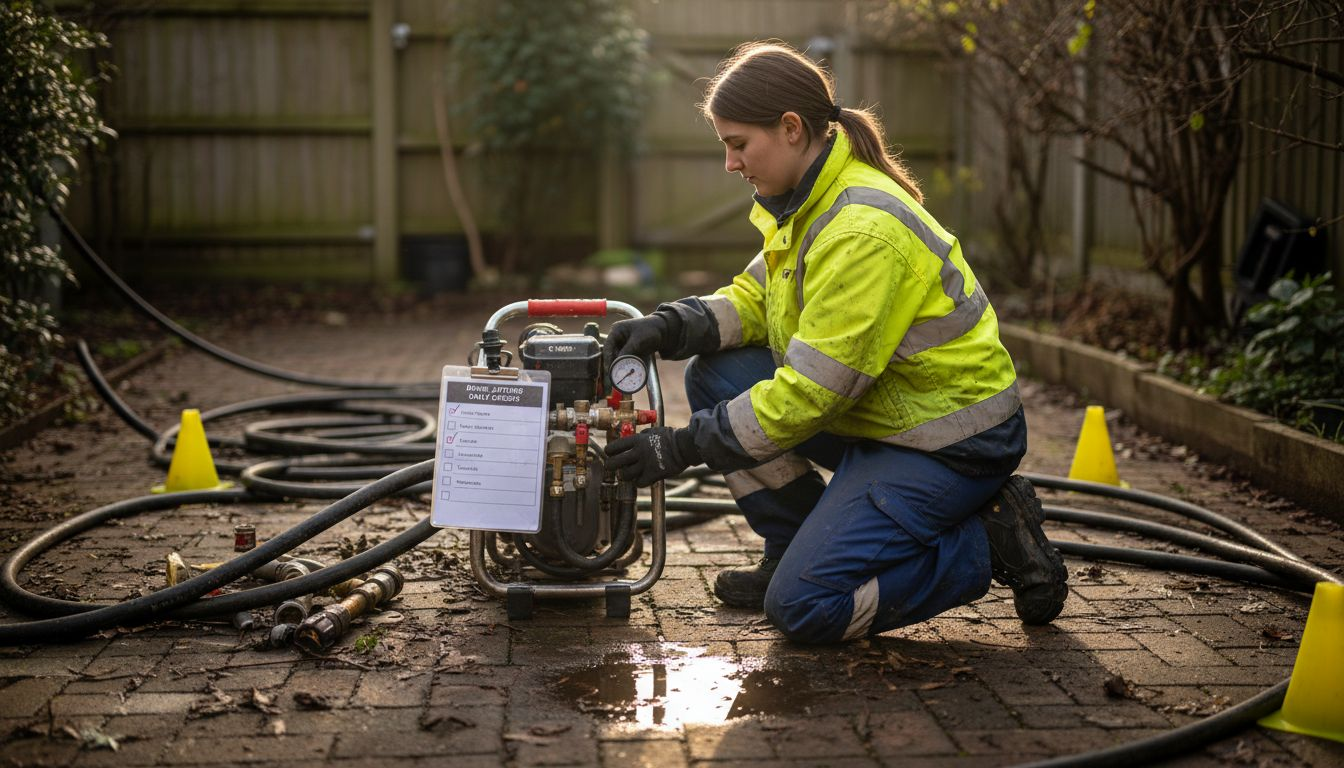
Start by checking your jetting machine and hose condition. Look for cracks, leaks, or worn sections on high-pressure hoses. Test the pump to confirm water pressure builds correctly. Following European Water Jetting Institute guidelines for equipment maintenance prevents dangerous failures mid-operation.
Assemble your personal protective equipment before touching the equipment:
- Safety glasses or face shield to protect against splashes
- Heavy-duty gloves rated for water pressure exposure
- Steel-toed boots with good grip
- High-visibility clothing so others see you working
- Hearing protection if your equipment produces loud noise
- Waterproof clothing to stay dry during longer jobs
Inspect all nozzles and fittings for damage or blockages. A cracked nozzle creates unpredictable water spray patterns and increases injury risk. Check pressure gauges work properly so you know your operational limits.
Fluid injection injuries from pressurised water remain a serious hazard if you’re careless around nozzles or connections. Never point equipment at yourself, others, or animals, even at lower pressures.
Worn gloves or missing protective equipment turn routine drain cleaning into a genuine safety emergency.
Set up your work zone by clearing debris around the drain entrance. Position your jetting machine on stable, level ground away from the actual work area. Ensure your hose runs smoothly without kinks that could rupture under pressure.
Before you start jetting, confirm water supply is sufficient and stable. Low pressure during operation wastes time and reduces blockage-clearing effectiveness.
Pro tip: Keep a checklist laminated near your equipment: equipment condition, PPE items, water supply, hose routing, and nozzle inspection. Ticking off boxes takes two minutes and prevents costly mistakes.
Step 3: Perform jetting to clear blockages
This is where the actual unblocking happens. You’ll now direct high-pressure water into your drains to break apart debris, flush out obstructions, and restore normal flow. The key is understanding direction, pressure control, and nozzle selection.
Begin by inserting the nozzle carefully into the drain opening. Start at low pressure to allow the hose to move smoothly and prevent sudden jerking. Gradually increase pressure as the nozzle feeds deeper into the pipe, feeling for resistance that indicates you’ve reached the blockage.
When you hit the blockage, follow jetting nozzle techniques that involve working against water flow for better clearance. This means positioning your nozzle to spray backwards, pushing debris toward the main sewer. Forward-facing jets sometimes just push material further down without breaking it apart.
Observe these critical operational steps:
- Never start jetting in flooded or waterlogged areas where pressure builds dangerously
- Move the nozzle slowly and deliberately through the pipe
- Reduce pressure slightly when retracting the hose to avoid damage
- Listen for changes in water sound, which indicate blockage breakdown
- Keep pressure steady once you’ve found your working range
As the blockage clears, you’ll notice water flowing more freely and the hose moving with less resistance. Continue jetting for another 30 to 60 seconds after the main obstruction breaks to flush away remaining debris and buildup coating your pipe walls.
The blockage won’t disappear instantly. You’re gradually fragmenting it into smaller pieces that wash away rather than violently explosing it in one moment.
Withdraw the nozzle slowly and methodically, maintaining consistent pressure throughout. Jerking it out suddenly can create dangerous pressure spikes or leave fragments lodged further down.
Pro tip: Have a second person monitor your pressure gauge and water output whilst you handle the hose. Sudden changes in gauge reading signal problems like nozzle blockage or hose damage before they become dangerous.
Step 4: Inspect drains for debris and flow
Once you’ve completed jetting, inspection reveals whether the blockage has truly cleared and your drains are functioning properly again. This step confirms your work succeeded and identifies any remaining issues before you finish.
With the nozzle withdrawn, run water through the drain at normal household pressure. Open taps, flush toilets, or use a garden hose to send water down the drain you’ve just jetted. Listen and observe how quickly it disappears. Water should flow without hesitation or backing up.
Walk to your inspection chambers and check water levels inside. They should be lower than before jetting, indicating proper drainage toward the main sewer. If water still sits high or drains slowly, blockage remains and requires additional jetting passes.
Look for these signs of successful clearing:
- Water drains completely within seconds
- No gurgling or unusual sounds from pipes
- Inspection chambers show normal water levels
- No foul odours lingering around drains
- Multiple fixtures drain simultaneously without backup
Remove any visible debris from inspection chambers using a net or scoop. Following routine inspection and cleaning protocols prevents debris accumulation that causes future blockages. Don’t leave sediment or fragments behind to resettle.
Check your surrounding area for any water overflow or unexpected pooling during the drainage test. Overflow suggests a more serious problem exists further down the line, potentially requiring professional CCTV surveys to pinpoint the exact location.
A drain that clears immediately tells you jetting worked. One that still drains slowly means there’s more work to do.
Document your results by noting the date, time jetting took, pressure levels used, and whether the blockage fully cleared. This record helps you and future professionals understand your drainage patterns and spot recurring problems.
Pro tip: Perform your drainage test using cold water first, then warm water from your kettle poured slowly into the drain. Temperature changes sometimes reveal partially stuck debris that normal flow alone misses.
Step 5: Verify effectiveness and prevent future problems
Successful drain jetting is only half the battle. The real win comes from confirming the blockage is gone and putting strategies in place so it never returns. This final step protects your investment and saves you from repeat callouts.
Wait 24 to 48 hours after jetting before drawing conclusions about long-term effectiveness. Some debris takes time to fully flush through your system, and temporary improvements can mask remaining blockages. Run water again and observe whether flow remains consistent with your post-jetting test.
Monitor these indicators over the following weeks:
- Drains that continue flowing freely without slowdown
- No return of gurgling or backing up
- Inspection chambers maintaining normal water levels
- Complete absence of foul drainage odours
- Multiple appliances working simultaneously without issues
If problems reappear quickly, blockage may extend beyond where your jetting reached. Tree roots, structural cracks, or grease buildup deeper in the line require professional assessment and potentially different solutions like CCTV surveys or pipe relining.
Implement preventive maintenance routines starting immediately. Implementing regular equipment inspections and preventive maintenance protocols applies to your home drains just as it does to professional systems. Monthly checks of your inspection chambers catch early warning signs before blockages form.
Prevent future blockages with these practical habits:
- Never pour cooking grease down kitchen drains
- Use drain guards to catch hair and food particles
- Flush only toilet paper down toilets, never wipes or hygiene products
- Run hot water weekly through drains to dissolve buildup
- Trim tree roots growing near your drain pipes
- Schedule professional jetting annually if you’re in a high-risk area
Prevention costs far less than emergency callouts when blockages strike during wet weather or holidays.
Keep records of your jetting work including dates, pressure settings, blockage location, and clearing results. This documentation helps you spot patterns. If the same drain blocks every winter, you’ll recognise the need for annual maintenance rather than waiting for failure.
Pro tip: Create a simple yearly maintenance calendar and mark inspection dates, jetting appointments, and drain cleaning tasks. Setting phone reminders ensures you never miss preventive work, keeping your Portsmouth drains flowing freely year-round.
The following table summarises maintenance actions and their preventive benefits:
| Maintenance Action | Frequency | Preventive Benefit |
|---|---|---|
| Inspection chamber checks | Monthly | Detects early blockage signs |
| Drain jetting | Annually | Clears accumulating debris |
| Running hot water through drains | Weekly | Dissolves grease and buildup |
| Trimming nearby tree roots | As needed | Prevents root intrusion |
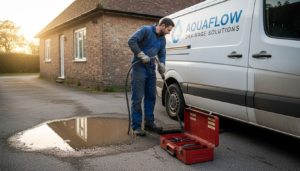
Restore Your Portsmouth Drains with Expert Jetting Solutions
Facing stubborn blockages or slow drainage can feel frustrating and overwhelming. This guide helps you understand how professional drain jetting breaks down debris and clears your drains safely and efficiently. If you have noticed pooling water, foul odours, or slow flow in your pipes it is essential to act promptly before the issue worsens.
Blockages often hide deep within your drainage lines where amateur methods fall short. Our specialists at Blocked Drains Portsmouth combine advanced jetting equipment with expert knowledge to deliver thorough unblocking services. Using precise pressure control and experienced techniques we remove grease, roots and buildup that cause repeated problems.

Don’t wait until damage or expensive repairs become unavoidable. Contact Blocked Drains Portsmouth today for reliable drain unblocking using industry-standard jetting methods. Visit our site now to learn more about how our solutions safeguard your home’s drainage and prevent future troubles. Take control of your drains and enjoy peace of mind in Portsmouth’s wetter seasons.
Frequently Asked Questions
What is drain jetting and how does it work?
Drain jetting is a method used to clear blockages in sewer pipes by using high-pressure water jets. To perform drain jetting, insert a special nozzle into the drain and direct high-pressure water to break up and flush away debris.
How do I assess drainage issues before jetting?
Begin by checking for signs of drainage problems, such as slow-draining sinks or pooling water in your garden. Observe your property’s water behaviour during rainfall and inspect any visible drain covers for blockages or high water levels.
What safety gear do I need for drain jetting?
Always wear personal protective equipment, including safety glasses, heavy-duty gloves, and steel-toed boots. Ensure your clothing is high-visibility and waterproof to keep you safe and comfortable during the operation.
How can I confirm that the blockage is cleared after jetting?
Run water through the drain after jetting to check for smooth flow without any back-up. Monitor the surrounding inspection chambers; they should be lower than before jetting, indicating proper drainage towards the main sewer.
What preventive measures can I take to avoid future drain blockages?
Implement regular maintenance routines such as inspecting inspection chambers monthly and using drain guards to catch debris. Additionally, run hot water through your drains weekly to dissolve potential grease build-up and trim any tree roots that may intrude into your pipes.
How often should I schedule professional drain jetting?
In high-risk areas prone to blockages, it is advisable to schedule professional drain jetting annually. This regular maintenance helps to clear accumulating debris and prevent sudden blockages, ensuring your drainage system functions efficiently.
Recommended
- How to Unblock Drains for Homeowners in Portsmouth
- Drain Unblocking – How it Impacts Portsmouth Homes
- 6 Effective Rainwater Drainage Solutions for Homeowners
- Top 4 FirstDrains.co.uk Alternatives in 2026 for Homeowners in Portsmouth Seeking Reliable Drainage Solutions
- Drain Jetting Procedure for Blocked Drains in London